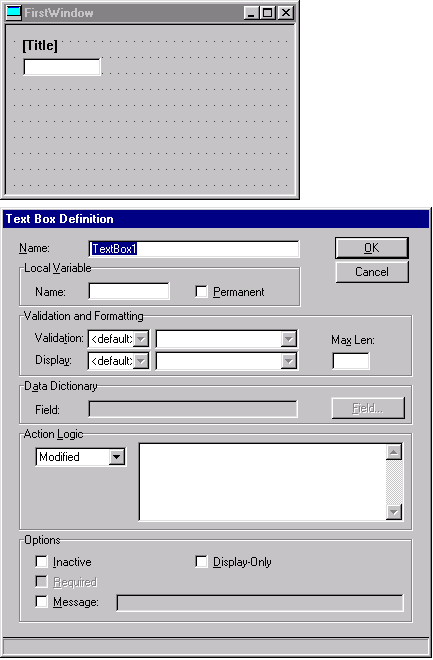

In order to insert a component, the mouse cursor has to be positioned over the edit-image of the new window at the location of the left upper corner of the desired location for the component, and the left mouse key is to be clicked once.
When this is done, the component will be inserted visibly into the edit-window, and a definition window will pop up as well.

Hint: This definition window contains a name for the
newly created component. When the component is created, MSM-Workstation
ensures that the new name is unique in the window, and that
the name of the component is descriptive of the nature of the
component in question.
There are benefits to changing this name to one that is more
meaningful to the designer, there are also benefits to leaving
these names "as generated".
Which works best for whom is a matter of preference
and judgement. In this tutorial, the convention will be followed
to accept the generated names.
In the case of a text box, one of the properties that one would like to define is probably the text that describes the meaning of the input field. This definition dialog is intended to define other properties, so modifying the default text ("[Title]") will have to wait until a subsequent step of this process.
When, in this window, at this time, the "Cancel" button is pressed, the component will be removed from the edit-window.
When the "OK" button is pressed, the new component is established in the edit-window, and further modifications may be made, both to the window as a whole, and to the last component inserted.
Go on to the next page in this sequence.