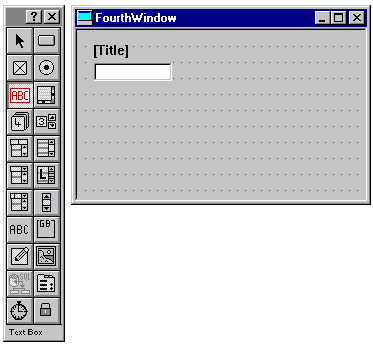
In order to make this happen, a new window will be created, with three text boxes and a button.
When the first text box is inserted, the display will look like:

The "prompt text" ("[Title]" can be changed using the "property bar" in MSM-Workstation:

Similarly, two more text boxes can be added, and the sizes of the boxes can be stretched to fill the length of the window:
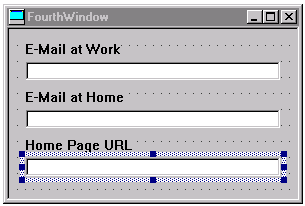
The window is now "full" and there still is a need to add more components. Of course, the window can be stretched to any size.
Hint: While developing windows on a nice workstation with
a large display, it is very easy to forget that some end-users
will have to use these windows on PCs with smaller monitors.
Always take care to constrain windows to a size of less than 640
by 480 pixels. The end-users will be a lot happier when they will
be able to see the "whole" picture.
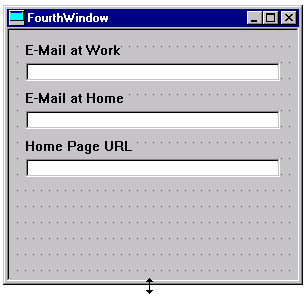
Stretching the window is done by positioning the mouse cursor over the edge of the window. The visible representation of the cursor will change to an arrow that indicates the kind of re-size control that can be excercised from the current mouse position. In this case, the window needs to be made slightly "higher".
Now, a button can be added, and the text boxes can be made slightly higher
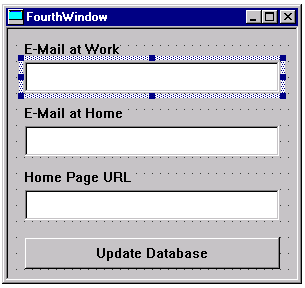
From here on, the process should be familiar by now: add the various pieces of code for initialization, and add code for the "push" event on the button:
Initialization of the window (code):
n t,x
s x=^macbeth("Person",demonum)
s t=$p(x,"|",1),x=$p(x,"|",2)
s:x'="" t=t_", "_x
s ^$w(%%CurrWin,"TITLE")=t
Initialization for the first text box (code):
n x
s x=$p($g(^macbeth("EMail",demonum)),"|",1)
s ^$w(%%CurrWin,"G","TextBox1","VALUE")=x
Initialization for the second text box (code):
n x
s x=$p($g(^macbeth("EMail",demonum)),"|",2)
s ^$w(%%CurrWin,"G","TextBox2","VALUE")=x
Initialization for the third text box (code):
n x
s x=$p($g(^macbeth("EMail",demonum)),"|",3)
s ^$w(%%CurrWin,"G","TextBox3","VALUE")=x
And code for the push event on the button (code):
n e1,e2,e3,x
s e1=$g(^$w(%%CurrWin,"G","TextBox1","VALUE"))
s e2=$g(^$w(%%CurrWin,"G","TextBox2","VALUE"))
s e3=$g(^$w(%%CurrWin,"G","TextBox3","VALUE"))
s ^macbeth("EMail",demonum)=e1_"|"_e2_"|"_e3
q
But... there is one little snag.
Obviously, it is the intent to invoke this window from the first window by adding a button there with a caption like "edit e-mail information". When only one instance of this (fourth) window is created, it is obvious what the value of the variable demonum will be. But when multiple instances of this window are starting to occur, this is no longer straightforward.
It would be possible to open a "fourth" window for King Duncan. At that moment, the value of demonum would be equal to 1, but... when subsequently a "fourth" window for is opened for Lady Macbeth, the value of demonum would obviously be different.
In order to remove this uncertainty, an additional component will
be added to the window. What is needed is a component with a
value that is constant for each instance of the "fourth" window,
but different for each instance as well.
Also, since this value is probably not really meaningful to the
end-user, it should not be shown in an obtrusive fashion.
In short, what is needed something that acts like an invisible label.
One method of adding such a feature is actually adding a label,
and making it invisible.
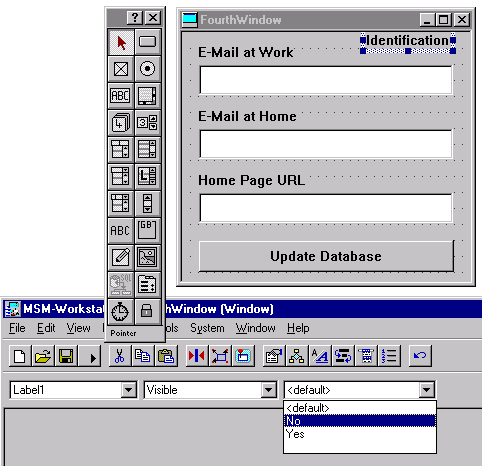
(Click here to cut and paste this code.)
The initialization code for this label will be:
s ^$w(%%CurrWin,"G","Label1","TITLE")=demonum
Another way of accomplishing the same is to add an application attribute (sometimes also called Y Attribute to the window. An application attribute can be any name that starts with uppercase Y, so another way of accomplishing the same would be to add to the create action logic of the window code like:
%%Set(YNUMBER,demonum)
or s ^$w(%%CurrWin,"YNUMBER")=demonum
with the obvious advantage that MSM-Workstation would not have to find the label, see that it is set to "invisible", and skip drawing it.
And the "push action logic" for the button will be updated to be:
n e1,e2,e3,x
s demonum=^$w(%%CurrWin,"G","Label1","TITLE")
s e1=$g(^$w(%%CurrWin,"G","TextBox1","VALUE"))
s e2=$g(^$w(%%CurrWin,"G","TextBox2","VALUE"))
s e3=$g(^$w(%%CurrWin,"G","TextBox3","VALUE"))
s ^macbeth("EMail",demonum)=e1_"|"_e2_"|"_e3
q
And now, the appropriate button can be added to the "first" window (actually, a couple more as well; all these buttons will trigger a different window, each intended to edit a different sub-set of the information). In a "real" application, one or more of these buttons might be "grayed out" based on the access privileges of the end-user.

(Click here to cut and paste this code.)
Adding the windows for the other buttons is a similar process and
left to the imagination of the student.
(The definitions from the "export" file ntr58.vex can
be imported into the current database to pre-define the windows
for the remaining buttons.
The code for these buttons can be cut and pasted from
the following links:
button2,
button3,
button5,
button6 and
button7.)
Remaining code segments:
Fifth window (edit name information):
Create window,
Create TextBox1,
Create TextBox2,
Create CheckBox1 and
Push Button1
Sixth window (edit address information):
Create window,
Create TextBox1,
Create TextBox2,
Create TextBox3,
Create TextBox4,
Create TextBox5,
Create TextBox6,
Create TextBox7 and
Push Button1
Seventh window (edit phone number information):
Create window,
Create TextBox1,
Create TextBox2,
Create TextBox3,
Create TextBox4,
Create TextBox5,
Create TextBox6,
Create DropDown1 and
Push Button1
Eighth window (edit picture information):
Create window,
Create TextBox1,
Create TextBox2,
Create TextBox3 and
Push Button1