Active X controls can be added to the capabilities of MSM-Workstation by just selecting the desired component from a list of possible choices.
Before any such component is added to any window, however, it is important to consider two issues:
It is not uncommon for developers to have many tools available that support their work, but the end-users of the products developed by these developers will not necessary have the licenses to use all the nifty developers' tools.
Quite often, different types of licenses are available for the components that may be added to applications. One type of license to support the level of access that a developer needs, and a much more restricted type of license to support the level of access that an end-user needs. In many cases, the end-user license is free of charge, but it is important to check for every developer to be aware of these issues, and investigate possible expenses, before using components in new product.
The addition of Active X controls to a MSM-Workstation application occurs in two steps:
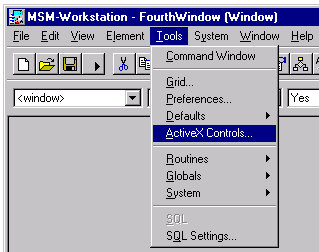
Adding an Active X control to the list of known external components is done through the option "ActiveX Controls" in the menu "Tools"

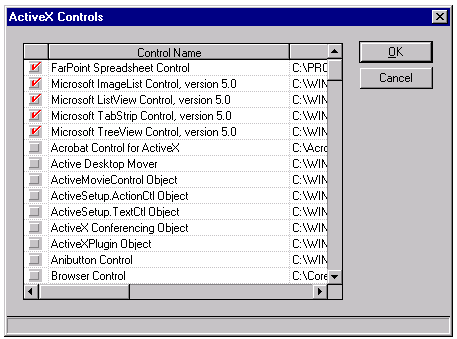
This menu option presents a window with a spreadsheet in which the various known external components are itemized:

In this window, the check boxes on the left indicate which components that are known to the system registry of the current operating system are eligible for inclusion in windows in MSM-Workstation.
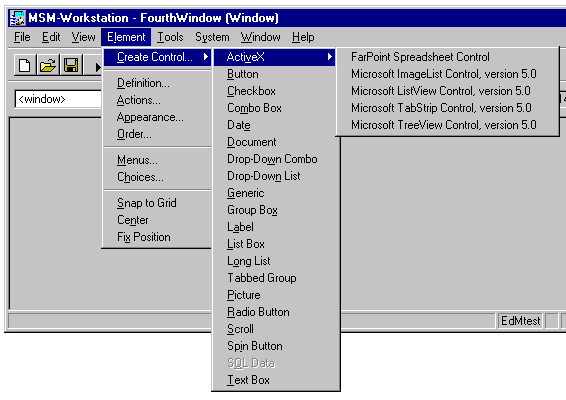
Once a component has been marked on this list as being available to MSM-Workstation, it can be selected to insert a new component into a window, using the option "ActiveX" from the sub-menu "Create Control" in the menu "Element".

In such a case, it is quite likely that a computer may receive a new version of an application, and that new version references an ActiveX control that is not yet known to the operating system on the computer where the application is being tested.
When this happens, some internal error will be reported in a pop-up window.
The appropriate remedial action, assuming that licensing allows distribution of the files in question to the test-computers, is to copy the file containing the component to the computer that needs it, and to "register" the component in the system registry.
For the sake of this tutorial, assume that the file c:\program files\micronetics\msmws\program\ss32x25.ocx needs to be registered.
Such registration is done using the program REGSVR32.EXE (under Windows NT, the full pathname for this file is c:\winnt\system32\regsvr32.exe, under Windows '95, the full pathname is c:\windows\regsvr32.exe).
One way of registering the "OCX" is to enter at the DOS prompt:
> regsvr32 "c:\program files\micronetics\msmws\program\ss32x25.ocx"
An easier way is to drag the icon for the OCX file over the icon for the registration and "drop the OCX into the registry".

After either way of "registering" the component type, a window will pop up to confirm registration of the new OCX.
